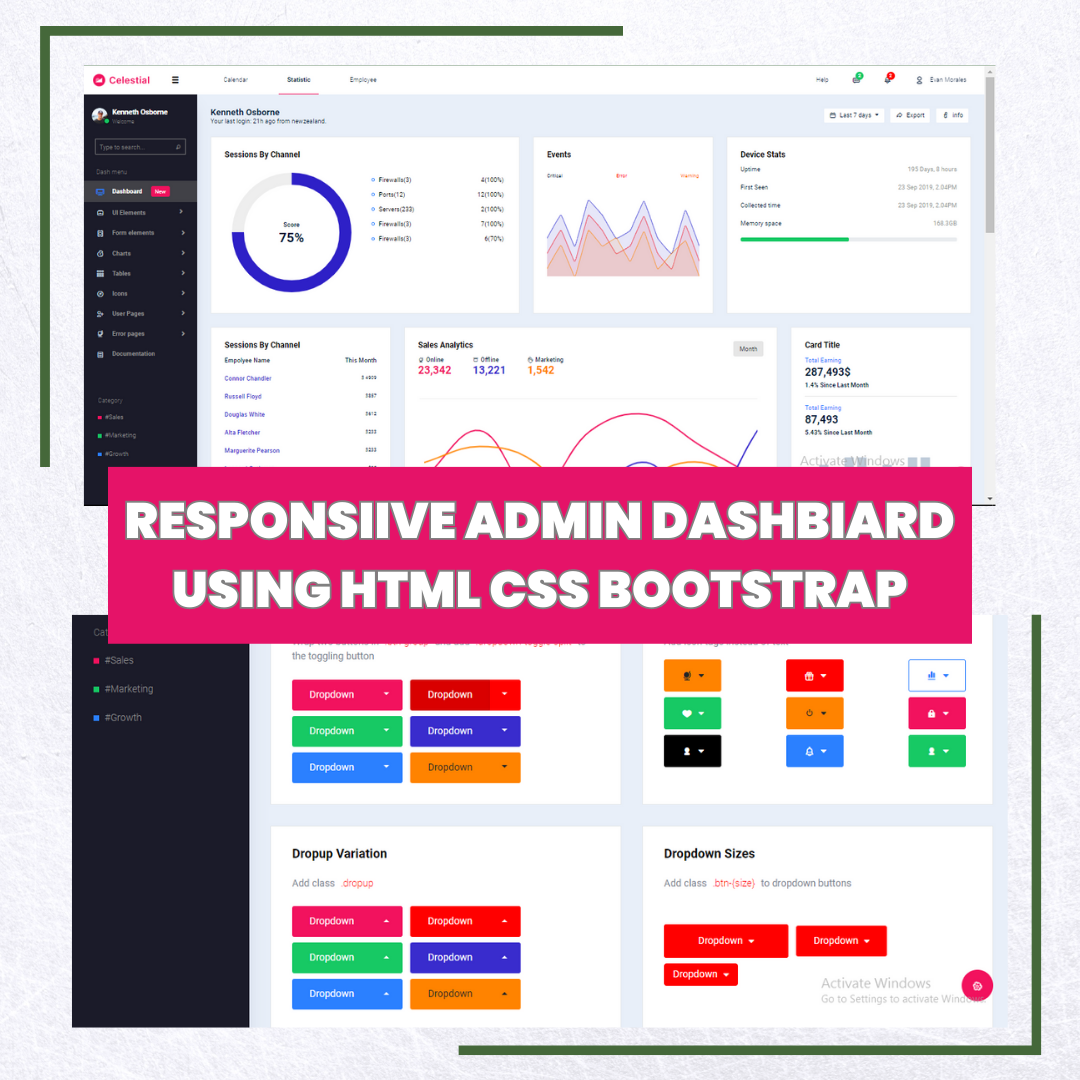
Responsive Admin Dashboard Using Html CSS Bootstrap & Javascript
Creating a responsive admin dashboard using HTML, CSS, and Bootstrap is an essential skill for web developers. In this tutorial, we will guide you through the process of designing a professional and visually appealing admin dashboard page that is both functional and mobile-friendly. Whether you are a beginner looking to learn HTML and CSS or an experienced developer seeking to enhance your dashboard design skills, this tutorial is perfect for you.
To begin, let’s focus on the layout and structure of our admin dashboard. We will utilize the Bootstrap framework, which offers a responsive grid system and a plethora of pre-built components. Start by setting up a basic HTML structure and linking the necessary CSS and Bootstrap files:
<!DOCTYPE html>
<html>
<head>
  <title>Admin Dashboard</title>
  <link rel="stylesheet" href="https://maxcdn.bootstrapcdn.com/bootstrap/4.3.1/css/bootstrap.min.css">
  <link rel="stylesheet" href="styles.css">
</head>
<body>
  <header>
    <!-- Header content goes here -->
  </header>

  <nav>
    <!-- Navigation content goes here -->
  </nav>

  <main>
    <!-- Main content goes here -->
  </main>

  <footer>
    <!-- Footer content goes here -->
  </footer>

  <script src="https://maxcdn.bootstrapcdn.com/bootstrap/4.3.1/js/bootstrap.min.js"></script>
</body>
</html>
With the basic structure in place, we can start designing the header, navigation, main content, and footer sections.
- Header: The header typically includes the logo and site title. Customize the header by adding relevant content and styling it according to your design preferences.
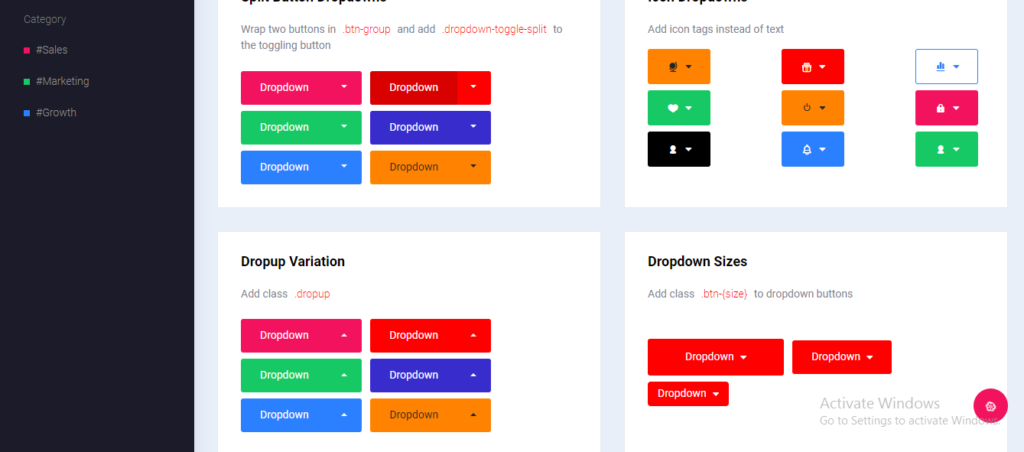
- Navigation: The navigation section is crucial for an admin dashboard as it provides easy access to various pages and features. Utilize the Bootstrap Navbar component to create a responsive and collapsible navigation menu. You can add dropdowns, icons, and other elements to enhance the functionality.
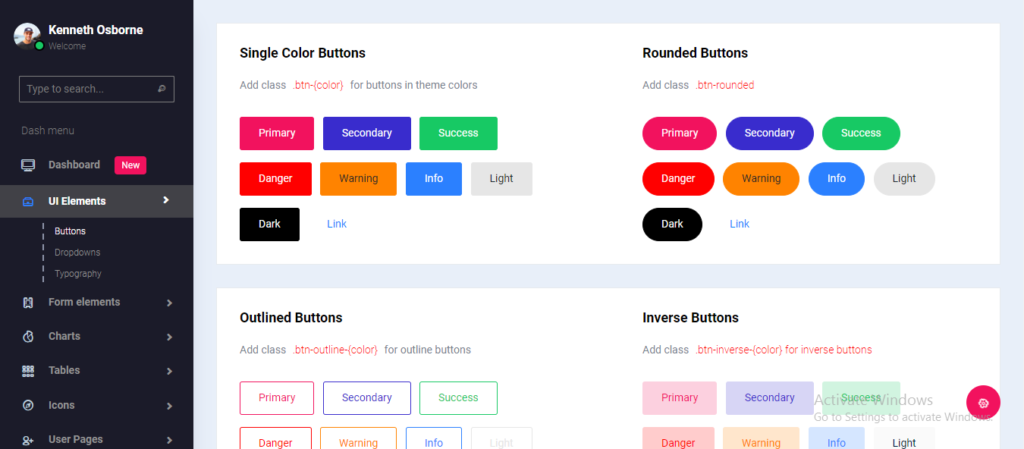
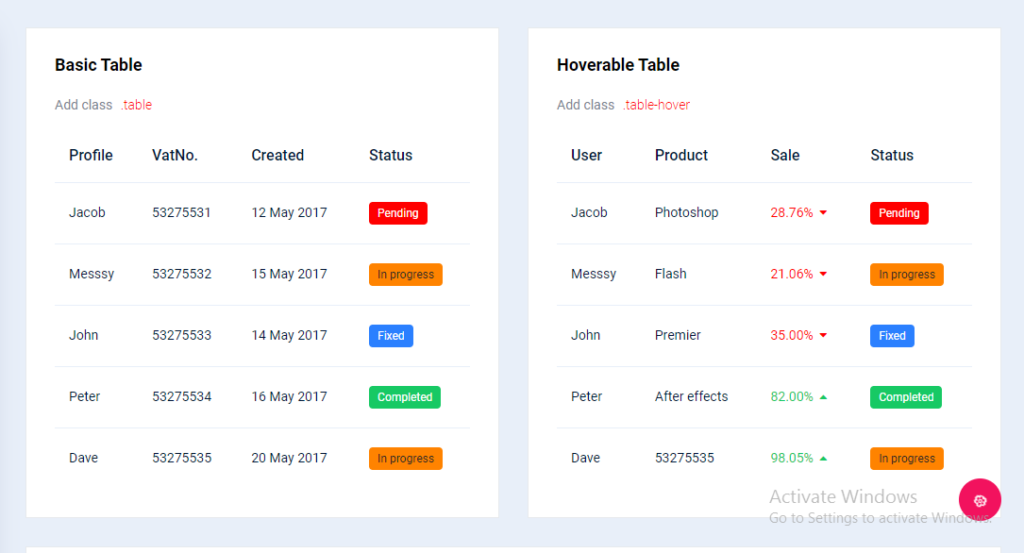
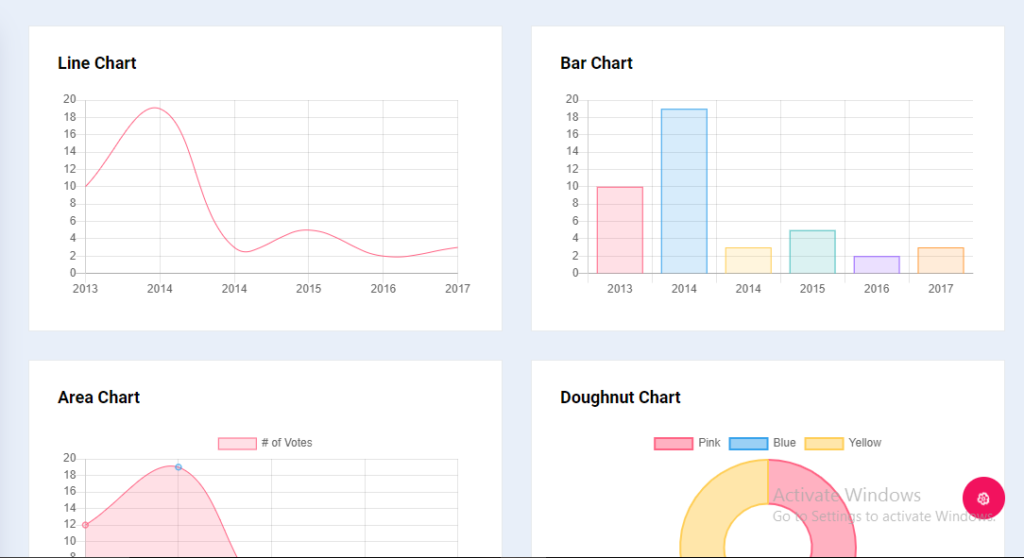
- Main Content: The main content area is where the dashboard widgets and data will be displayed. Use Bootstrap’s grid system to create a responsive layout for your widgets. You can include charts, tables, and other data visualization components to present information effectively.
- Footer: The footer section usually contains copyright information, links to important pages, or any additional content you want to include.
Now that we have outlined the basic structure and sections of the admin dashboard, let’s focus on the CSS styling. Create a separate CSS file (e.g., styles.css) and link it to your HTML file. In the CSS file, you can define custom styles for each section of the dashboard, including typography, colors, spacing, and more. Experiment with different CSS properties and values to achieve the desired visual effects.
To ensure responsiveness, leverage Bootstrap’s grid system and classes like container, row, and col to create fluid and adaptive layouts. Use media queries to adjust the styling based on different screen sizes, making the dashboard mobile-friendly.
In addition to the layout, you can enhance the aesthetics of your admin dashboard by incorporating icons, utilizing CSS animations, and choosing a visually pleasing color scheme.
Remember, this tutorial provides a foundation for creating a responsive admin dashboard using HTML, CSS, and Bootstrap. The complexity and functionality of your dashboard can be expanded based on your specific requirements and skill level.
In conclusion, designing a professional admin dashboard page is an essential skill for web developers. By following this tutorial and leveraging the power of HTML, CSS, and Bootstrap, you can create a visually appealing and mobile-friendly admin dashboard template. Remember to focus on the layout, structure, and styling of each section while incorporating responsiveness and usability. With practice and experimentation, you can refine your skills and create stunning admin dashboards for your web applications
How to Run the Responsive Admin Dashboard
- Download the Zip file
- Extract the file and in Copy All File
- Paste inside a seperate folder
- Double click in index.html page
Related Words :
admin dashboard,bootstrap admin dashboard,responsive admin dashboard,admin dashboard bootstrap 4,bootstrap dashboard,admin dashboard html css,bootstrap admin template,bootstrap admin dashboard tutorial,admin dashboard bootstrap,bootstrap 5 admin dashboard,bootstrap admin,responsive admin dashboard html css,admin panel,responsive admin dashboard menu layout,admin dashboard template,bootstrap 5 admin template,bootstrap 4 admin template, Dcode Materials
Watch Demo ;
Attached Some Screenshots